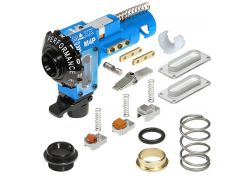
The airsoft hop-up; you wouldn’t think a tiny mechanism like that would be the most essential part of an airsoft replica. The small, light BB’s that you try to hit your opponent with, wouldn’t reach 50 metres without it though. To be able to reach those distances, you really need the clever bit of engineering that an airsoft hop-up unit actually is. It will give the BB a spin that’ll enhance accuracy and reach massively. That spin is what often is referred to as hop-up in airsoft when talking about the trajectory of a BB. The reach and accuracy it creates are the reasons why a hop-up unit can be found in almost every single airsoft replica. There’s a whole world of hop-ups for airsoft out there, but the working principle will be the same. But baseline is, that an airsoft hop-up unit is absolutely essential.
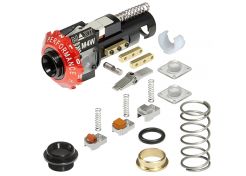
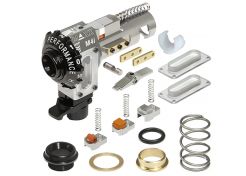
To be able to sort your way through all hop-up units and hop-up parts available, it’s important to know the importance of each part and how all parts of an airsoft hop-up unit interact with each other. That’s why we’ll introduce them to you step by step in this airsoft hop-up guide.
CHAMBER
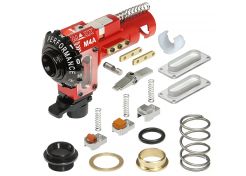
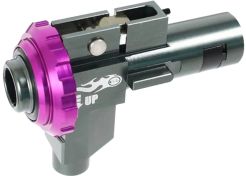
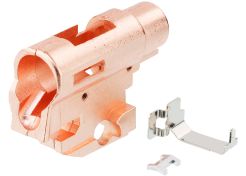
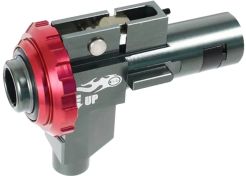
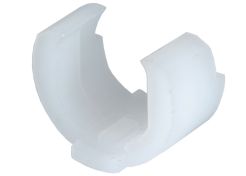
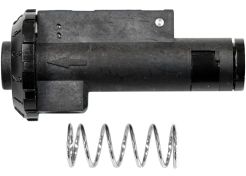
Let’s start with the hop-up chamber. It’s the body of the airsoft hop-up, the parts where all the other parts will come together as an airsoft hop-up unit. A BB will be fed into the chamber through the bottom. It will be kept in place by the hop-up bucking, also called a hop-up rubber, which we will come back to in a bit. When you pull the trigger, the nozzle of the gearbox will protrude through the opening of the bucking and push the BB in the barrel, before blasting it away with air. This process will repeat itself with every shot.
BUCKING
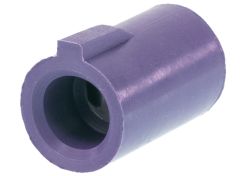
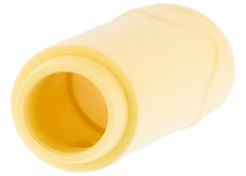
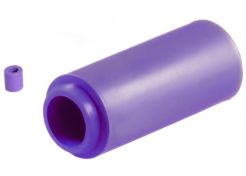
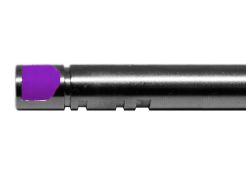
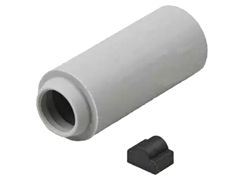
As promised, we’ll now come back to the hop-up bucking. This rubber/silicone tube, that also holds the barrel, creates an optimal air seal ensuring no pressure is lost while shooting. But that’s not the only task it has, as the other very important job it has to do is to create friction at the top of the BB when it’s thrusted through. That’s because the barrel has a cut-out at that spot, where the bucking can be pushed in to skimp the BB. How much friction this’ll give, depends partially on the compound of the bucking. There are many compounds for your airsoft hop-up available.
It’s said friction that gives the BB a reverse or backward spin that’ll give low pressure (lift) at the top of the BB, while creating high pressure at the underside, which’ll give more resistance. Simply said, the airflow at the back of the BB gets a downward impulse. And when following the law of equal force, this means the front will get an upward impulse, making the BB rise. Look at it as a curve ball.
It’s called the Magnus-effect and if you’ve properly set-up your airsoft hop-up unit, this will give you a very straight trajectory where the BB will show just a tiny bit of lift at the end, right before dropping. The distance that the BB can travel is many times longer because of the Magnus-effect. Without it, a BB wouldn’t reach that distance by far. Its minimal weight would quickly lose it against air resistance if it wasn’t for the spinning-effect. The spin also stabilises the BB, keeping it from straying left or right.
NUB
There’s one tiny part that we haven’t mentioned yet: the nub. A small piece of rubber or aluminium, that’s available in many shapes and those shapes each have their own effect on the BB by the friction they give. That’s because the nub will press down on the bucking, pushing it through the hole in the barrel, rubbing the BB as it passes by. By doing this, the top of the BB will be pulled backwards by the friction of the bucking when it passes by. This gives the BB its desired spin.
The different shapes of the nub each have a different effect on the BB and so does the amount of friction applied to the BB. Flat nubs will give an even friction. Hollow, or concave, nubs will create more friction at the sides of the BB, stabilising it a bit more. There’s a lot to be gained by finetuning, but there’s no formula for success, you just have to try which nub will work best in your replica.
There’s an adjustable arm for the airsoft hop-up adjustment. This arm will push the nub deeper or less deep into the bucking. It’s this simple adjustment that lets you perfectly set-up your airsoft hop-up unit. The adjustable arm is controlled with an adjustment wheel. It can differ where this wheel is placed. Some can be adjusted from the outside of the replica, while others require a bit of dismantling of the replica to reach them.
The adjustment itself can differ too; some wheels have clicks while others are stepless. Clicks enable you to quickly adjust your hop-up depending on the situation, when you’ve previously determined the number of clicks. A stepless adjustable airsoft hop-up unit, however, is more precise. Where clicks make steps of a certain size that you might be better off between, stepless adjustment enables you to get the adjustment absolutely spot on. The intuitive adjustment that clicks offer you, will be missing though.
Besides all these parts, the BB itself is also of influence on the flight curve. This is mainly the weight. If you -for instance- change from .20 grammes BB’s to .25 grammes BB’s, you’ll definitely have to adjust the airsoft hop-up unit. Logically, airsoft hop-up units often have a maximum weight for BB’s to give the desired spin. But you can work around that by using parts like softer buckings that will give a bit more friction.
So, by reading our airsoft hop-up guide, you now know how a hop-up works. And what all the different components actually do. You also know the weight of a BB is an important factor. But how do you combine all this information into producing the best trajectory for your BB’s? It’s not only distance you want, but also consistency. Because it’s nice to be able to shoot a hundred metres plus, but it’s even better to actually hit what you’re aiming at.
You’ll achieve this by finding the right balance. If a hop-up applies too little pressure on a BB, you’ll notice it will drop very rapidly. To raise the pressure, you need to use the adjusting wheel to lower the hop-up arm. This will push the nub deeper into the bucking, creating more friction when the BB passes. If you apply too much pressure, you’ll see the BB reaching for the clouds. The created spin will then be too excessive, making the BB forget about gravity for a while. So you need to find a balance. Not too little, neither too much. But how do you find that balance?
To be able to really see the effect that the hop-up has, it’s good to shoot over a longer distance. First, you open up the airsoft hop-up completely, making sure the arm doesn’t push the nub into the bucking. You now start shooting and after every shot, you tighten up the hop-up unit. Eventually, you’ll get a flat trajectory where the BB will rise slightly at the end, right before dropping. As soon as the BB starts climbing higher sooner, you dial back a bit. Sometimes, the adjustments will be minuscule, millimetres, so take care to not make the adjustments too big.
Other times, the adjustment can stray a bit during the day. This can be caused by temperature changes, wind or simply a hop-up arm that starts to slacken off a bit. Luckily, most hop-up units are made in such a way, that it doesn’t take much to adjust them. It’s just a question of tightening or loosening the arm and you’re back on target again.
As you’ll have realised by now, after reading our airsoft hop-up guide and airsoft hop-up adjustment tips above, there’s no specific ‘best’ airsoft hop-up. It all depends on which replica you have, which BB’s you use, et cetera. The best hop-up for airsoft is often a mix of airsoft parts and be assured that we’ve got the best hop-up parts to achieve the ultimate hop-up set-up for your replica. Don’t hesitate to contact our experts. We can assure you that you’ll end up with the best hop-up unit and best bucking and nub to suit your wishes.